c h r o n o l o g i c a l
g u i d e
> Year 1 Year 2 <
> Year 3 Year 4 <
> Year 5 Year 6 <
> Year 7 Year 8 <
> Year 9 Year 12 <
fetching & dismantling
sandblasting & evil rust
right "b" pillar
fixing right inner sill
basic body repair, por-15
frame removed, footwell repair
hole fixed, car flipped, etc.
sill stiffeners, rear bulkhead, etc.
various small parts
left sill, added stiffener, etc.
- lousy weather
trunk floor (reprise)
right floor, left sill, etc.
left floor, wheel well, etc.
right upper wishbone
floor done, car righted
rack, front frame, evil rust
left door cleaned & fitted
right door, right suspension
bonnet, part 1
bonnet, part 2
bonnet, part 3
bonnet, part 4
bonnet, part 5, etc.
bonnet, part 6
bonnet, outer sill, etc.
lots of stuff
left side, bonnet internals
frame, bonnet attached
engine stand, oil pan removal
pistons removed, sanding
sanding, final filling
color, frames, primer
brushed primer test
2nd coat primer
holiday greetings!
finish prep, detail on dent fix
spraying primer
winter chores
1. undercoat, plating prep
2. plating, spraying color
bonnet, plate prep, cylinder head
cylinder head paint, bushes
plating saga
front frame, suspension, part 1
front suspension, part 2
front suspension, part 3
priming and painting
bonnet, part 7
painting color!
boot lid, steering wheel
gas tank
winter chores
1. firewall sundry
2. front suspension
3. steering setup
4. master cylinders/pedals
5. the rest
data plate screed
winter to spring
1. irs rebuild
2. trunk floor, harness
3. data plate (again)
data plate, door, headlights
dash vinyl, crosshatch aluminum
windshield, right door
interior, "widget"
chrome parts!
door handle details
rolling chassis
molasses rust removal
electrical, part 1
bores, thrust washers
new engine!
head differences
block differences
compression ratio
engine in place!
alternator
catchup & photos
it runs!
setback and brakes
darned close & engine diffs
driven
top and seats
driving and little stuff
|
|
|
Easy-To-Make Rollable Bonnet Stand
Dennis Tarkir asked for pictures and some specifications for my rolling bonnet stand, so here they are.
Bonnet storage is usually a pain, since the total volume of the bonnet amounts to over one-third of the E-type's total volume. So, when you're
storing the bonnet, you're basically expecting to store a third of the car someplace out of the way. People have devised means of hanging bonnets
from their ceilings and against walls. I was lucky for a while, since I dismantled the who thing an was able to stack panels more or less compactly.
After you have the thing back together, you've got to put it somewhere.
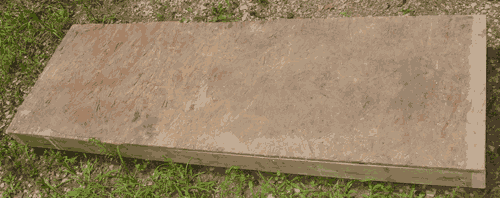
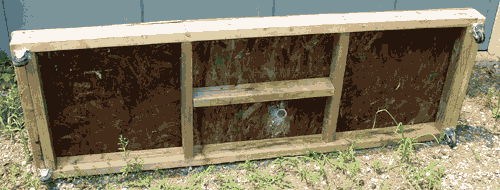
I put together a two-foot by six-foot rolling stand on two inch casters. I had the wood lying around, salvaged from an old chicken coop, but I got
the casters at Lowes. I chose to get two swivel casters and two fixed ones, which turned out to be less than optimal. I'd have been better off had I
bought four swivel casters. It wasn't really too much of a problem, but I did find myself dragging the fixed casters around a few times. Also,
two-inch hard rubber wheels barely do the trick. I'd get three-inchers for easier handling.


The frame is made of two-by-fours. Note the doubling on each end to support the casters well. A middle support is advisable, since the bonnet will
cause sagging, and the structure needs to be firm to prevent instability or leaning of the bonnet. The top is large-chip particle board with
half-inch thickness.
When I stored the bonnet, the rear section went on the stand. I put some thin cardboard down on the plywood to cushion the edge slightly. When mounted
on the stand, everything is rollable and stable. Appropriately, the bonnet looks like it's ready to launch.
|
|
| |

